Keeping your firearm clean is not just about appearances; it's about maintaining its functionality and longevity. When you regularly clean your firearm, you're ensuring that it performs reliably and safely each time you use it. One of the best ways to achieve a thorough clean is by using the Vulcan Carbon Killer Solvent, designed to remove all carbon buildup and contaminants without causing any damage to your gun.
Cleaning your firearm might seem daunting at first, but with the right supplies and a clear step-by-step guide, it becomes a simple task. Each step, from gathering your supplies to disassembling, cleaning, and reassembling your gun, plays a crucial role in the efficiency and safety of the cleaning process. Using high-quality products like the Carbon Killer Solvent and the Vulcan Cleaning Rag makes the job even easier and more effective.
By following this guide, you'll learn how to properly clean your firearm, ensuring that it remains in top condition for years to come. Let's get started on making sure that your firearm is always ready and reliable.
Gathering Your Cleaning Supplies
Before starting the cleaning process, it's essential to gather all the necessary supplies. Having everything on hand makes the process smoother and more efficient. Here are the key items you’ll need:
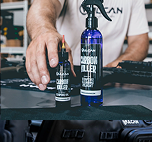
- Carbon Killer Cleaning Solvent: This is the main cleaning agent you'll use to remove carbon buildup and grime from your firearm. Its non-toxic, military-grade formula ensures a thorough clean without damaging your gun.
- Carbon Killer Cleaning Oil: This oil provides a protective barrier against rust and corrosion. It also lubricates moving parts to ensure smooth operation.
- Vulcan Cleaning Rag: This soft yet firm cleaning rag is perfect for wiping down your firearm. It helps to remove all the buildup that the solvent dislodges.
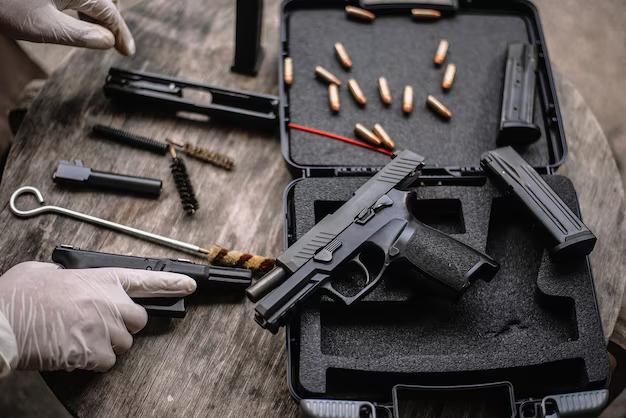
- Cleaning Brushes and Rods: Use these to scrub the inside of the barrel and other tight spaces. Brushes of various sizes help to make sure every part of the firearm is clean.
- Gloves and Eye Protection: Safety first! Wearing gloves protects your hands from chemicals, and eye protection keeps any splashes away from your eyes.
With these supplies, you’re ready to start the disassembly and cleaning process.
Disassembling Your Firearm Safely
Disassembling your firearm is a critical step in the cleaning process. Doing it safely ensures that you can clean each part without causing damage or injury. Follow these steps:
- Unload Your Firearm: First and foremost, make sure your firearm is completely unloaded. Remove any magazines and check the chamber to ensure there are no rounds left inside. Safety is the top priority.
- Clear Your Workspace: Create a clean and organized workspace where you can lay out your firearm parts. Use a mat or cloth to keep small parts from getting lost.
- Refer to the Manual: If you’re unsure how to disassemble your firearm, refer to the manufacturer’s manual. This guide will show you the correct steps and order for disassembling parts without causing damage.
- Start with the Slide or Barrel: Generally, you’ll start by removing the slide or barrel, depending on your type of firearm. Carefully detach these components and set them aside.
- Organize Small Parts: As you disassemble your firearm, keep track of small parts like pins, springs, and screws. Place them in a small container so they don’t get lost.
By following these steps, you’ll have your firearm disassembled and ready for a thorough cleaning using the Carbon Killer Solvent. Remember to handle each part with care to avoid damage and ensure a smooth reassembly later.
Step-by-Step Cleaning Process with Carbon Killer Solvent
Cleaning your firearm with the Carbon Killer Solvent is an easy process if you follow these steps carefully. This solvent is specially designed to remove carbon buildup and other grime effectively. Here’s how you can do it:
- Apply the Solvent: Begin by applying the Carbon Killer Solvent to the areas with carbon buildup or dirt. Use a small brush or cloth to spread the solvent evenly over the parts. Make sure to cover every nook and cranny, especially the hard-to-reach spots.
- Scrub Away Dirt: Use cleaning brushes to scrub the areas where you've applied the solvent. The brushes help to dislodge and remove the carbon deposits and grime. Be gentle but thorough to ensure you do not scratch or damage the gun parts.
- Wipe Down with Cleaning Rag: Take the Vulcan Cleaning Rag and wipe down all the areas you've scrubbed. The rag’s soft yet firm texture is perfect for picking up loosened dirt and excess solvent. Make sure to thoroughly clean each part.
- Apply Carbon Killer Cleaning Oil: Once you've wiped down your firearm, apply a small amount of the Carbon Killer Cleaning Oil to moving parts and any areas prone to rust. This oil acts as a lubricant and rust preventative, ensuring your gun stays in top condition.
- Final Inspection: Inspect your firearm to make sure there’s no solvent or dirt left behind. If you find any spots, repeat the steps as necessary until your firearm is completely clean.
By following these steps, you’ll ensure that your firearm is free of carbon buildup and ready for use.
Reassembling and Storing Your Firearm Properly
After cleaning each part of your firearm, it’s time to reassemble it. This step is just as important as cleaning because improper reassembly can affect your gun’s functionality. Here’s how to do it correctly:
- Refer to the Manual: Just like during disassembly, refer to your firearm's manual for specific reassembly instructions. The manual ensures you put everything back in the correct order and position.
- Start with Major Components: Begin by reattaching the major components such as the slide, barrel, and frame. Make sure they fit together smoothly. If there’s any resistance, double-check to ensure all parts are properly aligned.
- Secure Small Parts: Reattach small parts like pins, springs, and screws. Use a small container to keep track of these parts during the process. Tighten screws and ensure that pins are seated securely.
- Function Check: Once reassembled, perform a function check to ensure everything works correctly. Slide the action back and forth, test the trigger, and make sure the safety mechanisms are functioning.
- Proper Storage: Store your firearm in a safe and secure place. Using the Vulcan QuickMag can be an excellent choice for mounting your gun securely in an accessible location. Ensure that the storage area is dry and away from moisture to prevent rust.
Conclusion
Cleaning your firearm with the Carbon Killer Solvent ensures that your gun remains reliable and safe to use. Following the step-by-step guide helps maintain your firearm in pristine condition, extending its life and performance. By gathering the right supplies, disassembling your gun properly, cleaning each part meticulously, and reassembling it with care, you can be confident that your firearm is always ready when you need it.
At VULCAN Arms, we provide premium solvents for cleaning guns designed to keep your firearms in top shape. Ready to experience the benefits of our high-quality cleaning solutions? Visit VULCAN Arms today and equip yourself with the best in firearm maintenance.




Share:
Innovative Cleaning Solutions: Exploring Vulcan Carbon Killer Solvent
How to Use the WeatherLock Pistol Case Pocket